Using Renderers
In This Topic
Overview
Each object that provides a NUIRenderer instance implements INRendererProvider and its Renderer property gives you access to the current renderer. Via this property you can apply your custom renderers or use the current one to perform some drawing operations. All renderers have a base class - NUIRenderer which declares base methods and properties and implements lots of static functions meant to help you with your custom development.
Extending Renderers
Although you have total control over each control's appearance, in some cases you might need an additional feature that is not implemented by the default renderer. In other words, you will need a custom renderer. Each renderer can be easily extended programmatically to fit your specific needs.
The following example extends a NScrollBarRenderer and overrides its DrawThemeThumb method:
| C# |
Copy Code
|
|---|---|
public override void DrawThemeThumb(Graphics g, NScrollBarButton button) { g.SmoothingMode = System.Drawing.Drawing2D.SmoothingMode.AntiAlias; Rectangle r = button.Bounds; g.FillEllipse(Brushes.Red, r); r.Height -= 1; g.DrawEllipse(Pens.Black, r); r.Inflate(-4, -4); g.FillEllipse(Brushes.Yellow, r); g.SmoothingMode = System.Drawing.Drawing2D.SmoothingMode.Default; } |
|
| Visual Basic |
Copy Code
|
|---|---|
Public Overrides Sub DrawThemeThumb(ByVal g As Graphics, ByVal button As NScrollBarButton) g.SmoothingMode = System.Drawing.Drawing2D.SmoothingMode.AntiAlias Dim r As Rectangle = button.Bounds g.FillEllipse(Brushes.Red, r) r.Height -= 1 g.DrawEllipse(Pens.Black, r) r.Inflate(-4, -4) g.FillEllipse(Brushes.Yellow, r) g.SmoothingMode = System.Drawing.Drawing2D.SmoothingMode.Default End Sub |
|
This is the default appearance of a NHScrollBar in color scheme WindowsDefault:

The result of the custom renderer:

Changing renderer is as easy as a property set:
| C# |
Copy Code
|
|---|---|
this.nhScrollBar1.Renderer = myCustomRenderer;
|
|
| Visual Basic |
Copy Code
|
|---|---|
Me.nhScrollBar1.Renderer = myCustomRenderer
|
|
Drawing Visual Styles
The NUIRenderer class provides a wrapper method for drawing Windows XP® Visual Styles. Simply call DrawThemeBackground method with the desired parameters and you will get a visual style applied on the graphics surface provided.
The following code demonstrates how to render a visual style tab in a selected state:
[C#]

NUIRenderer.DrawThemeBackground(IntPtr.Zero, "TAB", graphics, 1, 3, new Rectangle(0, 0, 150, 50));
Here is the result of the method:

For more information about visual styles and parts and states refer to MSDN.
Drawing 3D-borders
NUIRenderer provides rich support for drawing 3D-borders. Select among 10 predefined border styles and specify base color for calculating light and dark values and default single-border color.
The following example demonstrates how to draw a border using NUIRenderer:
| C# |
Copy Code
|
|---|---|
NUIRenderer.DrawBorder3D(graphics, new Rectangle(0, 0, 150, 50), BorderStyle3D.RaisedFrame, Color.Brown, Color.Gray);
|
|
| Visual Basic |
Copy Code
|
|---|---|
NUIRenderer.DrawBorder3D(graphics, New Rectangle(0, 0, 150, 50), BorderStyle3D.RaisedFrame, Color.Brown, Color.Gray)
|
|

Drawing Images
Drawing images in different states - grayed, disabled, faded - has never been easier. Using the NUIRenderer it is a matter of a single function call to achieve the desired effect on your images. The renderer provides two overloads of the DrawImage static method - using graphics, image, rectangle and boolean parameters specifying whether to render image disabled and faded. The other overload uses a NDrawImageInfo object providing more extended control over image rendering.
The following example demonstrates how to draw images in different states, using the first overload:
| C# |
Copy Code
|
|---|---|
Rectangle rect = new Rectangle(2, 2, 100, 100); Size sz = myImage.Size; Rectangle imageRect = new Rectangle(rect.Left, rect.Top, sz.Width, sz.Height); //draw standard image NUIRenderer.DrawImage(graphics, myImage, imageRect, false, false); //draw grayed image imageRect.X += sz.Width + 2; NUIRenderer.DrawImage(graphics, myImage, imageRect, true, false); //draw faded image imageRect.X += sz.Width + 2; NUIRenderer.DrawImage(graphics, myImage, imageRect, false, true); |
|
| Visual Basic |
Copy Code
|
|---|---|
Dim rect As Rectangle = New Rectangle(2, 2, 100, 100) Dim sz As Size = myImage.Size Dim imageRect As Rectangle = New Rectangle(rect.Left, rect.Top, sz.Width, sz.Height) 'draw standard image NUIRenderer.DrawImage(graphics, myImage, imageRect, False, False) 'draw grayed image imageRect.X += sz.Width + 2 NUIRenderer.DrawImage(graphics, myImage, imageRect, True, False) 'draw faded image imageRect.X += sz.Width + 2 NUIRenderer.DrawImage(graphics, myImage, imageRect, False, True) |
|
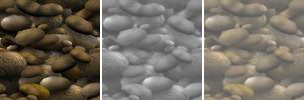
The result of the code above:
The following example demonstrates image rendering using NDrawImageInfo:
| C# |
Copy Code
|
|---|---|
//draw tiled image Rectangle imageRect = this.label1.ClientRectangle; r.Width -= 1; r.Height -= 1; r.Inflate(-2, -2); //construct the image info and assign preferred values NDrawImageInfo info = new NDrawImageInfo(); info.Image = pictureBox1.Image; info.DestinationRect = imageRect; info.DrawMode = ImageDrawMode.Tile; NUIRenderer.DrawImage(g, info); |
|
| Visual Basic |
Copy Code
|
|---|---|
'draw tiled image Dim imageRect As Rectangle = Me.label1.ClientRectangle r.Width -= 1 r.Height -= 1 r.Inflate(-2, -2) 'construct the image info and assign preferred values Dim info As NDrawImageInfo = New NDrawImageInfo() info.Image = pictureBox1.Image info.DestinationRect = imageRect info.DrawMode = ImageDrawMode.Tile NUIRenderer.DrawImage(g, info) |
|
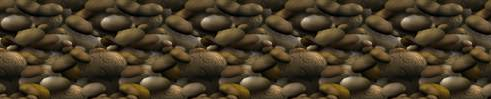
The result of the above code:
See Also