The dialog’s Show method will return the id (integer value) of the clicked button rather than a value from the DialogResult enumeration. You may examine the returned result like this:
| C# |
Copy Code
|
|---|---|
int result = myTaskDialog.Show(); if(result != (int)DialogResult.OK) return; // continue with application logic ... |
|
| Visual Basic |
Copy Code
|
|---|---|
Dim result As Integer = myTaskDialog.Show() If result <> CInt(DialogResult.OK) Then return ' continue with application logic ... |
|
The default, non-customized task dialog will behave like a standard message box. Specify the title, content’s text and/or icon, common buttons (the default one is "OK") and call its Show method:
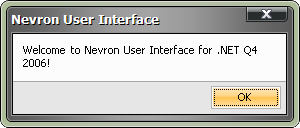
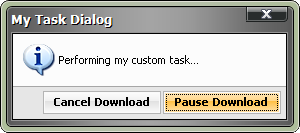
In many cases you will need a message box with buttons are not "common" – for example you may not change the text or order of the standard ones. The NTaskDialog overcomes this limitation by exposing an additional array of user-definable NPushButtonElement generic UI elements which are completely customizable in any aspect of visual representation.
The following example demonstrates how to create and assign custom buttons to an NTaskDialog:
| C# |
Copy Code
|
|---|---|
using Nevron.UI; using Nevron.UI.WinForm; using Nevron.UI.WinForm.Controls; NTaskDialog dialog = new NTaskDialog (); dialog.Title = "My Task Dialog"; dialog.Content.Image = NSystemImages.Information; dialog.Content.ImageSize = new NSize(32, 32); dialog.Content.Text = "Performing my custom task..."; NPushButtonElement cancelButton = new NPushButtonElement(); cancelButton.Text = "<b>Cancel Download</b>"; cancelButton.Id = 1; NPushButtonElement pauseButton = new NPushButtonElement(); pauseButton.Text = "<b>Pause Download</b>"; pauseButton.Id = 2; // assign the newly created buttons to the dialog dialog.UserButtons = new NPushButtonElement[] { cancelButton, pauseButton}; // display the dialog to the user int result = dialog.Show(); // perform specific action switch(result) { case 1: Cancel(); break; case 2: Pause(); break; } |
|
| Visual Basic |
Copy Code
|
|---|---|
Imports Nevron.UI Imports Nevron.UI.WinForm Imports Nevron.UI.WinForm.Controls Dim dialog As NTaskDialog = New NTaskDialog () dialog.Title = "My Task Dialog" dialog.Content.Image = NSystemImages.Information dialog.Content.ImageSize = New NSize(32, 32) dialog.Content.Text = "Performing my custom task..." Dim cancelButton As NPushButtonElement = New NPushButtonElement() cancelButton.Text = "<b>Cancel Download</b>" cancelButton.Id = 1 Dim pauseButton As NPushButtonElement = New NPushButtonElement() pauseButton.Text = "<b>Pause Download</b>" pauseButton.Id = 2 ' assign the newly created buttons to the dialog dialog.UserButtons = New NPushButtonElement() { cancelButton, pauseButton} ' display the dialog to the user Dim result As Integer = dialog.Show() ' perform specific action Select Case result case 1 Cancel() case 2 Pause() End Select |
|
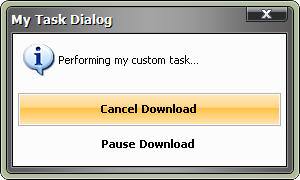
The NTaskDialog exposes yet another array of user-definable buttons which are laid-out and displayed in a different way. Large buttons expand all the client width of the dialog and are arranged in a vertical stack straight under the Content area. They are also painted in a slightly different way – in "Normal" state they do not have a background style applied.
Large buttons are created and specified in much the same way as the standard user buttons in the upper example.
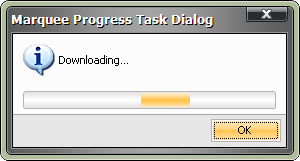
Often an application needs to display a dialog notifying that an operation with indeterminate length is currently running. Our NTaskDialog comes with a built-in support for displaying a marquee progress along with the rest of the content and buttons.
The following example demonstrates how to create and show a dialog which displays marquee progress:
| C# |
Copy Code
|
|---|---|
using Nevron.UI; using Nevron.UI.WinForm; using Nevron.UI.WinForm.Controls; NTaskDialog dialog = new NTaskDialog (); dialog.Title = "Marquee Progress Task Dialog"; dialog.Content.Image = NSystemImages.Information; dialog.Content.ImageSize = new NSize(32, 32); dialog.Content.Text = "Downloading..."; dialog.ProgressType = TaskDialogProgressType.Marquee; // start the marquee loop as it is not started by default dialog.MarqueeProgress.Start(); // display the dialog to the user dialog.Show(); |
|
| Visual Basic |
Copy Code
|
|---|---|
Imports Nevron.UI Imports Nevron.UI.WinForm Imports Nevron.UI.WinForm.Controls Dim dialog As NTaskDialog = New NTaskDialog () dialog.Title = "Marquee Progress Task Dialog" dialog.Content.Image = NSystemImages.Information dialog.Content.ImageSize = New NSize(32, 32) dialog.Content.Text = "Downloading..." dialog.ProgressType = TaskDialogProgressType.Marquee ' start the marquee loop as it is not started by default dialog.MarqueeProgress.Start() ' display the dialog to the user dialog.Show() |
|
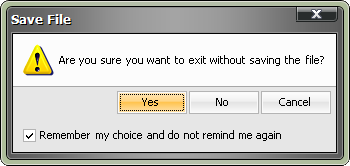
Yet another useful add-on in the NTaskDialog over the standard message box is the so called "Verification" – a check box with additional option – like "Do not display this message again". The verification will be displayed under the user buttons, before the footer.
The following example demonstrates how to create and show a task dialog which displays verification:
| C# |
Copy Code
|
|---|---|
using Nevron.UI; using Nevron.UI.WinForm; using Nevron.UI.WinForm.Controls; NTaskDialog dialog = new NTaskDialog (); dialog.Title = "Save File"; dialog.Content.Image = NSystemImages.Warning; dialog.Content.ImageSize = new NSize(32, 32); dialog.Content.Text = "Are you sure you want to exit without saving the file?"; dialog.PredefinedButtons = TaskDialogButtons.Yes | TaskDialogButtons.No | TaskDialogButtons.Cancel; // specify verification text dialog.Verification.Text = "Remember my choice and do not remind me again"; // display the dialog to the user dialog.Show(); // determine the state of the verification if(dialog.Verification.CheckState == CheckState.Checked) { // remember the user’s choice } |
|
| Visual Basic |
Copy Code
|
|---|---|
Imports Nevron.UI Imports Nevron.UI.WinForm Imports Nevron.UI.WinForm.Controls Dim dialog As NTaskDialog = New NTaskDialog () dialog.Title = "Save File" dialog.Content.Image = NSystemImages.Warning dialog.Content.ImageSize = New NSize(32, 32) dialog.Content.Text = "Are you sure you want to exit without saving the file?" dialog.PredefinedButtons = TaskDialogButtons.Yes Or TaskDialogButtons.No Or TaskDialogButtons.Cancel ' specify verification text dialog.Verification.Text = "Remember my choice and do not remind me again" ' display the dialog to the user dialog.Show() ' determine the state of the verification If dialog.Verification.CheckState = CheckState.Checked Then ' remember the user’s choice End If |
|
The task dialog provides a convenient way for hooking to different notifications like Loaded, Closing/Closed, ButtonClick, TimerTick, etc. via a delegate which is called for every notification.
The following example demonstrates how to create and show a task dialog which displays an increasing progress-bar:
| C# |
Copy Code
|
|---|---|
using Nevron.UI; using Nevron.UI.WinForm; using Nevron.UI.WinForm.Controls; NTaskDialog dialog = new NTaskDialog (); dialog.Title = "File Download"; dialog.Content.Image = NSystemImages.Information; dialog.Content.ImageSize = new NSize(32, 32); dialog.Content.Text = "Downloading..."; dialog.PredefinedButtons = TaskDialogButtons.Cancel; // specify verification text dialog.Verification.Text = "Close this dialog when download is complete"; // display a standard progress bar dialog.ProgressType = TaskDialogProgressType.Standard; // enable the timer dialog.EnableTimer = true; dialog.TimerInterval = 100; dialog.Notify += new NTaskDialogCallBack(OnTaskDialogCallBack); // display the dialog to the user dialog.Show(); ... // the callback implementation private void OnTaskDialogCallBack(object sender, NTaskDialogEventArgs e) { if(e.Notification == TaskDialogNotification.TimerTick) { e.Dialog.ProgressBar.Value++; } } |
|
| Visual Basic |
Copy Code
|
|---|---|
Imports Nevron.UI Imports Nevron.UI.WinForm Imports Nevron.UI.WinForm.Controls Dim dialog As NTaskDialog = New NTaskDialog () dialog.Title = "File Download" dialog.Content.Image = NSystemImages.Information dialog.Content.ImageSize = New NSize(32, 32) dialog.Content.Text = "Downloading..." dialog.PredefinedButtons = TaskDialogButtons.Cancel ' specify verification text dialog.Verification.Text = "Close this dialog when download is complete" ' display a standard progress bar dialog.ProgressType = TaskDialogProgressType.Standard ' enable the timer dialog.EnableTimer = True dialog.TimerInterval = 100 AddHandler Notify, AddressOf OnTaskDialogCallBack ' display the dialog to the user dialog.Show() ... ' the callback implementation Private Sub OnTaskDialogCallBack(ByVal sender As Object, ByVal e As NTaskDialogEventArgs) Handles dialog.Notify If e.Notification = TaskDialogNotification.TimerTick Then e.Dialog.ProgressBar.Value += 1 End If End Sub |
|
Note that the "sender" parameter of the callback depends on the notification – for example it will be an NPushButtonElement for ButtonClick and the internally created NForm for Loaded.